Drawer Pull Out Tilt Box Dieline
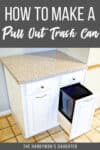
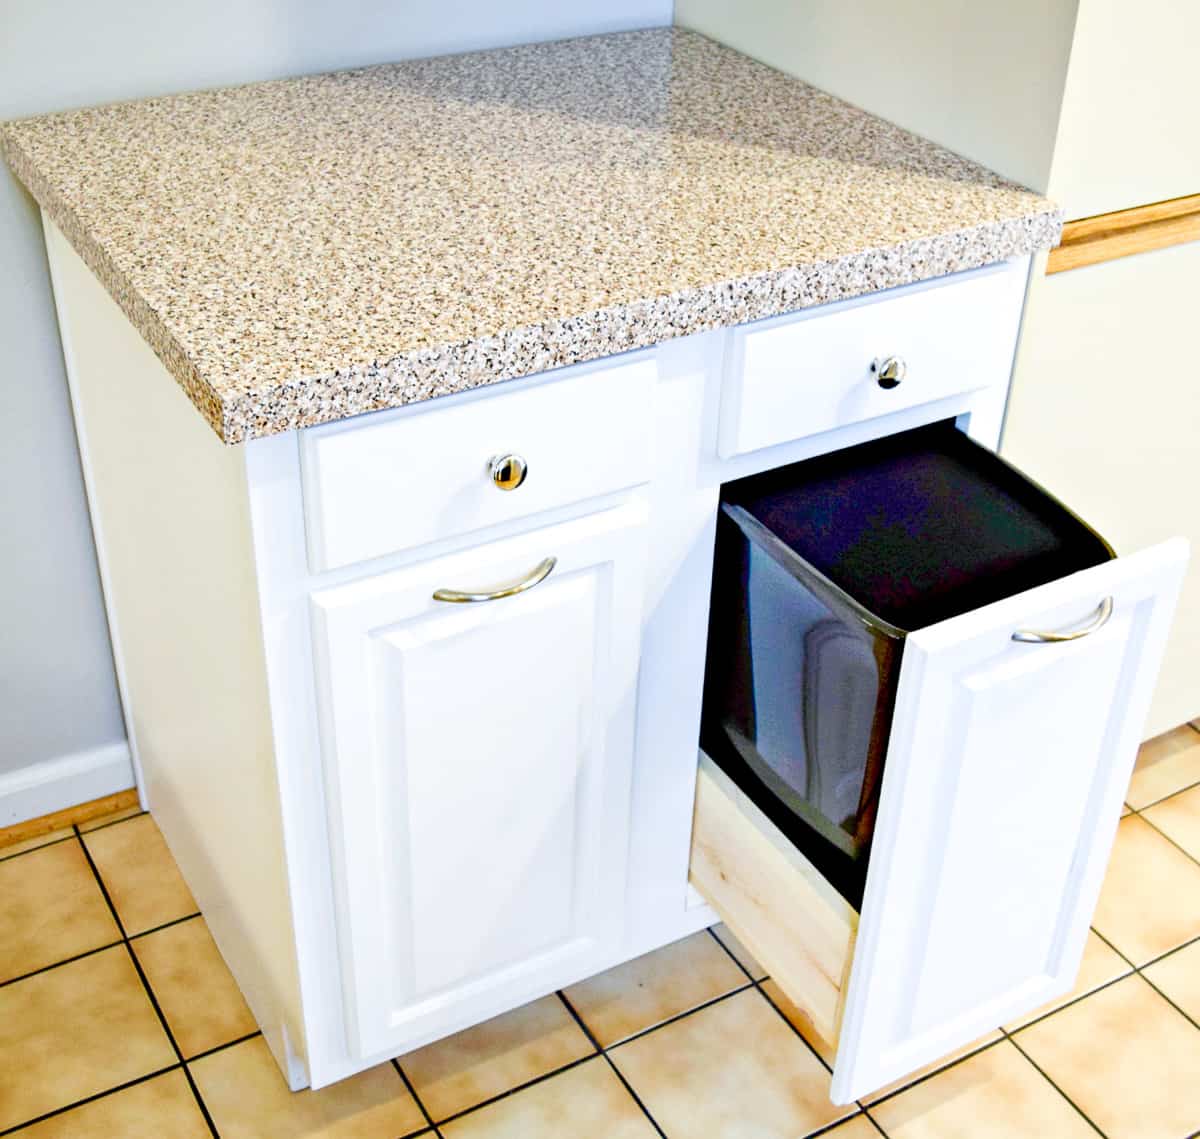
This DIY pull out trash can is just what your kitchen needs! Learn how to convert any lower cabinet into a custom pull out trash tin cabinet with just a few tools!

Are you lot tired of looking at your gross kitchen trash can while you melt? Brand this pull out trash can chiffonier and hibernate information technology abroad instead! This is a fairly unproblematic project, and is a fraction of the cost of ane of those fancy store-bought kits!
Don't want to cede one of your existing cabinets? I found a used kitchen chiffonier that fit into the spot where the trash cans were stored. It gives us a identify to hide them away, plus extra counter space!
This post contains affiliate links for your convenience. Purchases made through these links may earn me a small committee at no additional toll to you. Delight visit my disclosures page for more information.
Supplies Needed
- One 1 ten 6 lath
- Ane 1 x 12 board or 2'x2' sheet of ¾" plywood
- One set up of 24" drawer slides
- Check out the dissimilar types of drawer slides to run across which one is right for your project.
- Kreg Jig and one ¼" pocket pigsty screws
- Y'all can also use regular woods screws and a countersink drill bit.
- Wood glue
- Cordless drill
- 24" clamps
- Trash can that is slightly shorter and narrower than your opening
How to Make a Trash Can Cabinet
Take Measurements Starting time
The size of your chiffonier opening and the drawer slides y'all use will determine how big to make the trash tin can drawer. Centre mount drawer slides give you more flexibility in the size of your box, merely aren't equally stable as side mountain slides. Here are the general guidelines for measuring for each type:
- Center mount drawer slides
- Needs at least 1 / 8" of clearance on both sides of the opening, but can be smaller if you lot're putting the trash can on i side of a double-door opening.
- Requires ane ½" of clearance in the back for the bracket that holds the drawer rail in place.
- If you have a cabinet with a face frame that is flush with the bottom shelf, you'll need to elevate the front end with a slice of 1x2 board. I go into this process in more detail below!
- Side mount drawer slides
- The box needs to be exactly the width of the opening minus the thickness of the slides.
- The drawer can be the same depth as the cabinet, so you tin potentially fit ii cans in the same space.
- May require additional blocking if there's a face frame on the front of the chiffonier. This will bring the sides fifty-fifty with the opening and give you something to screw the drawer slides to.
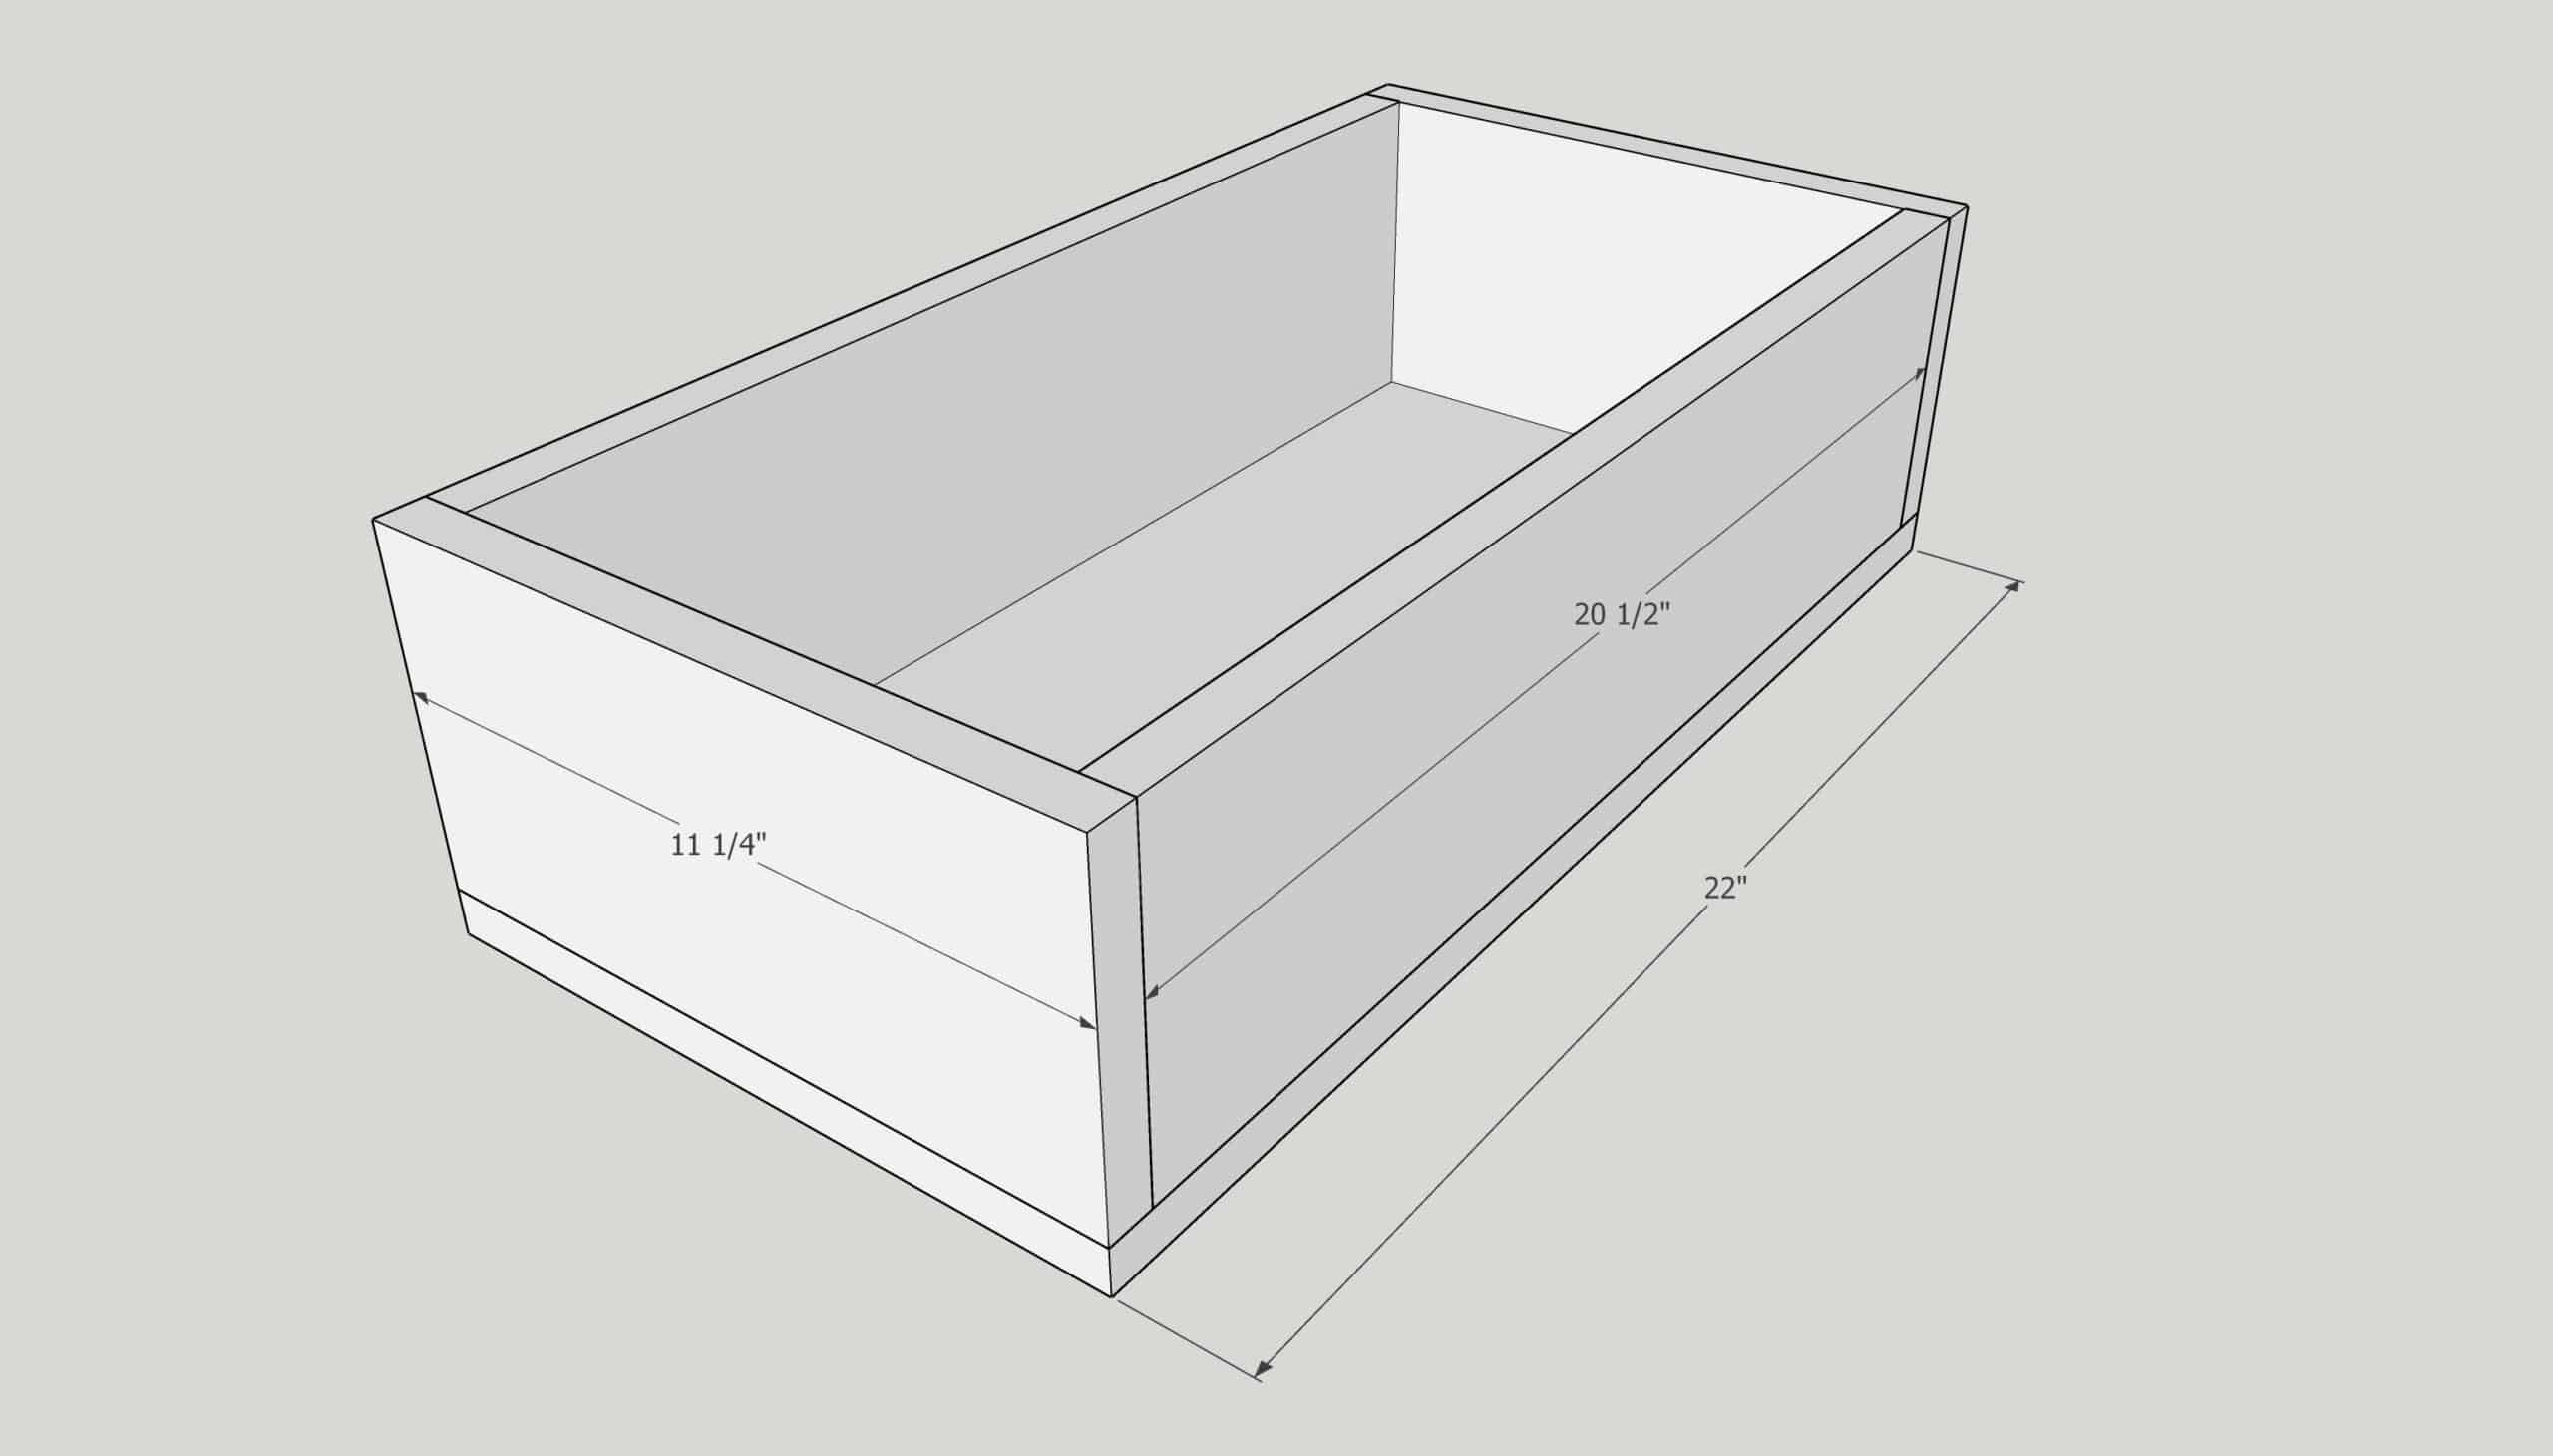
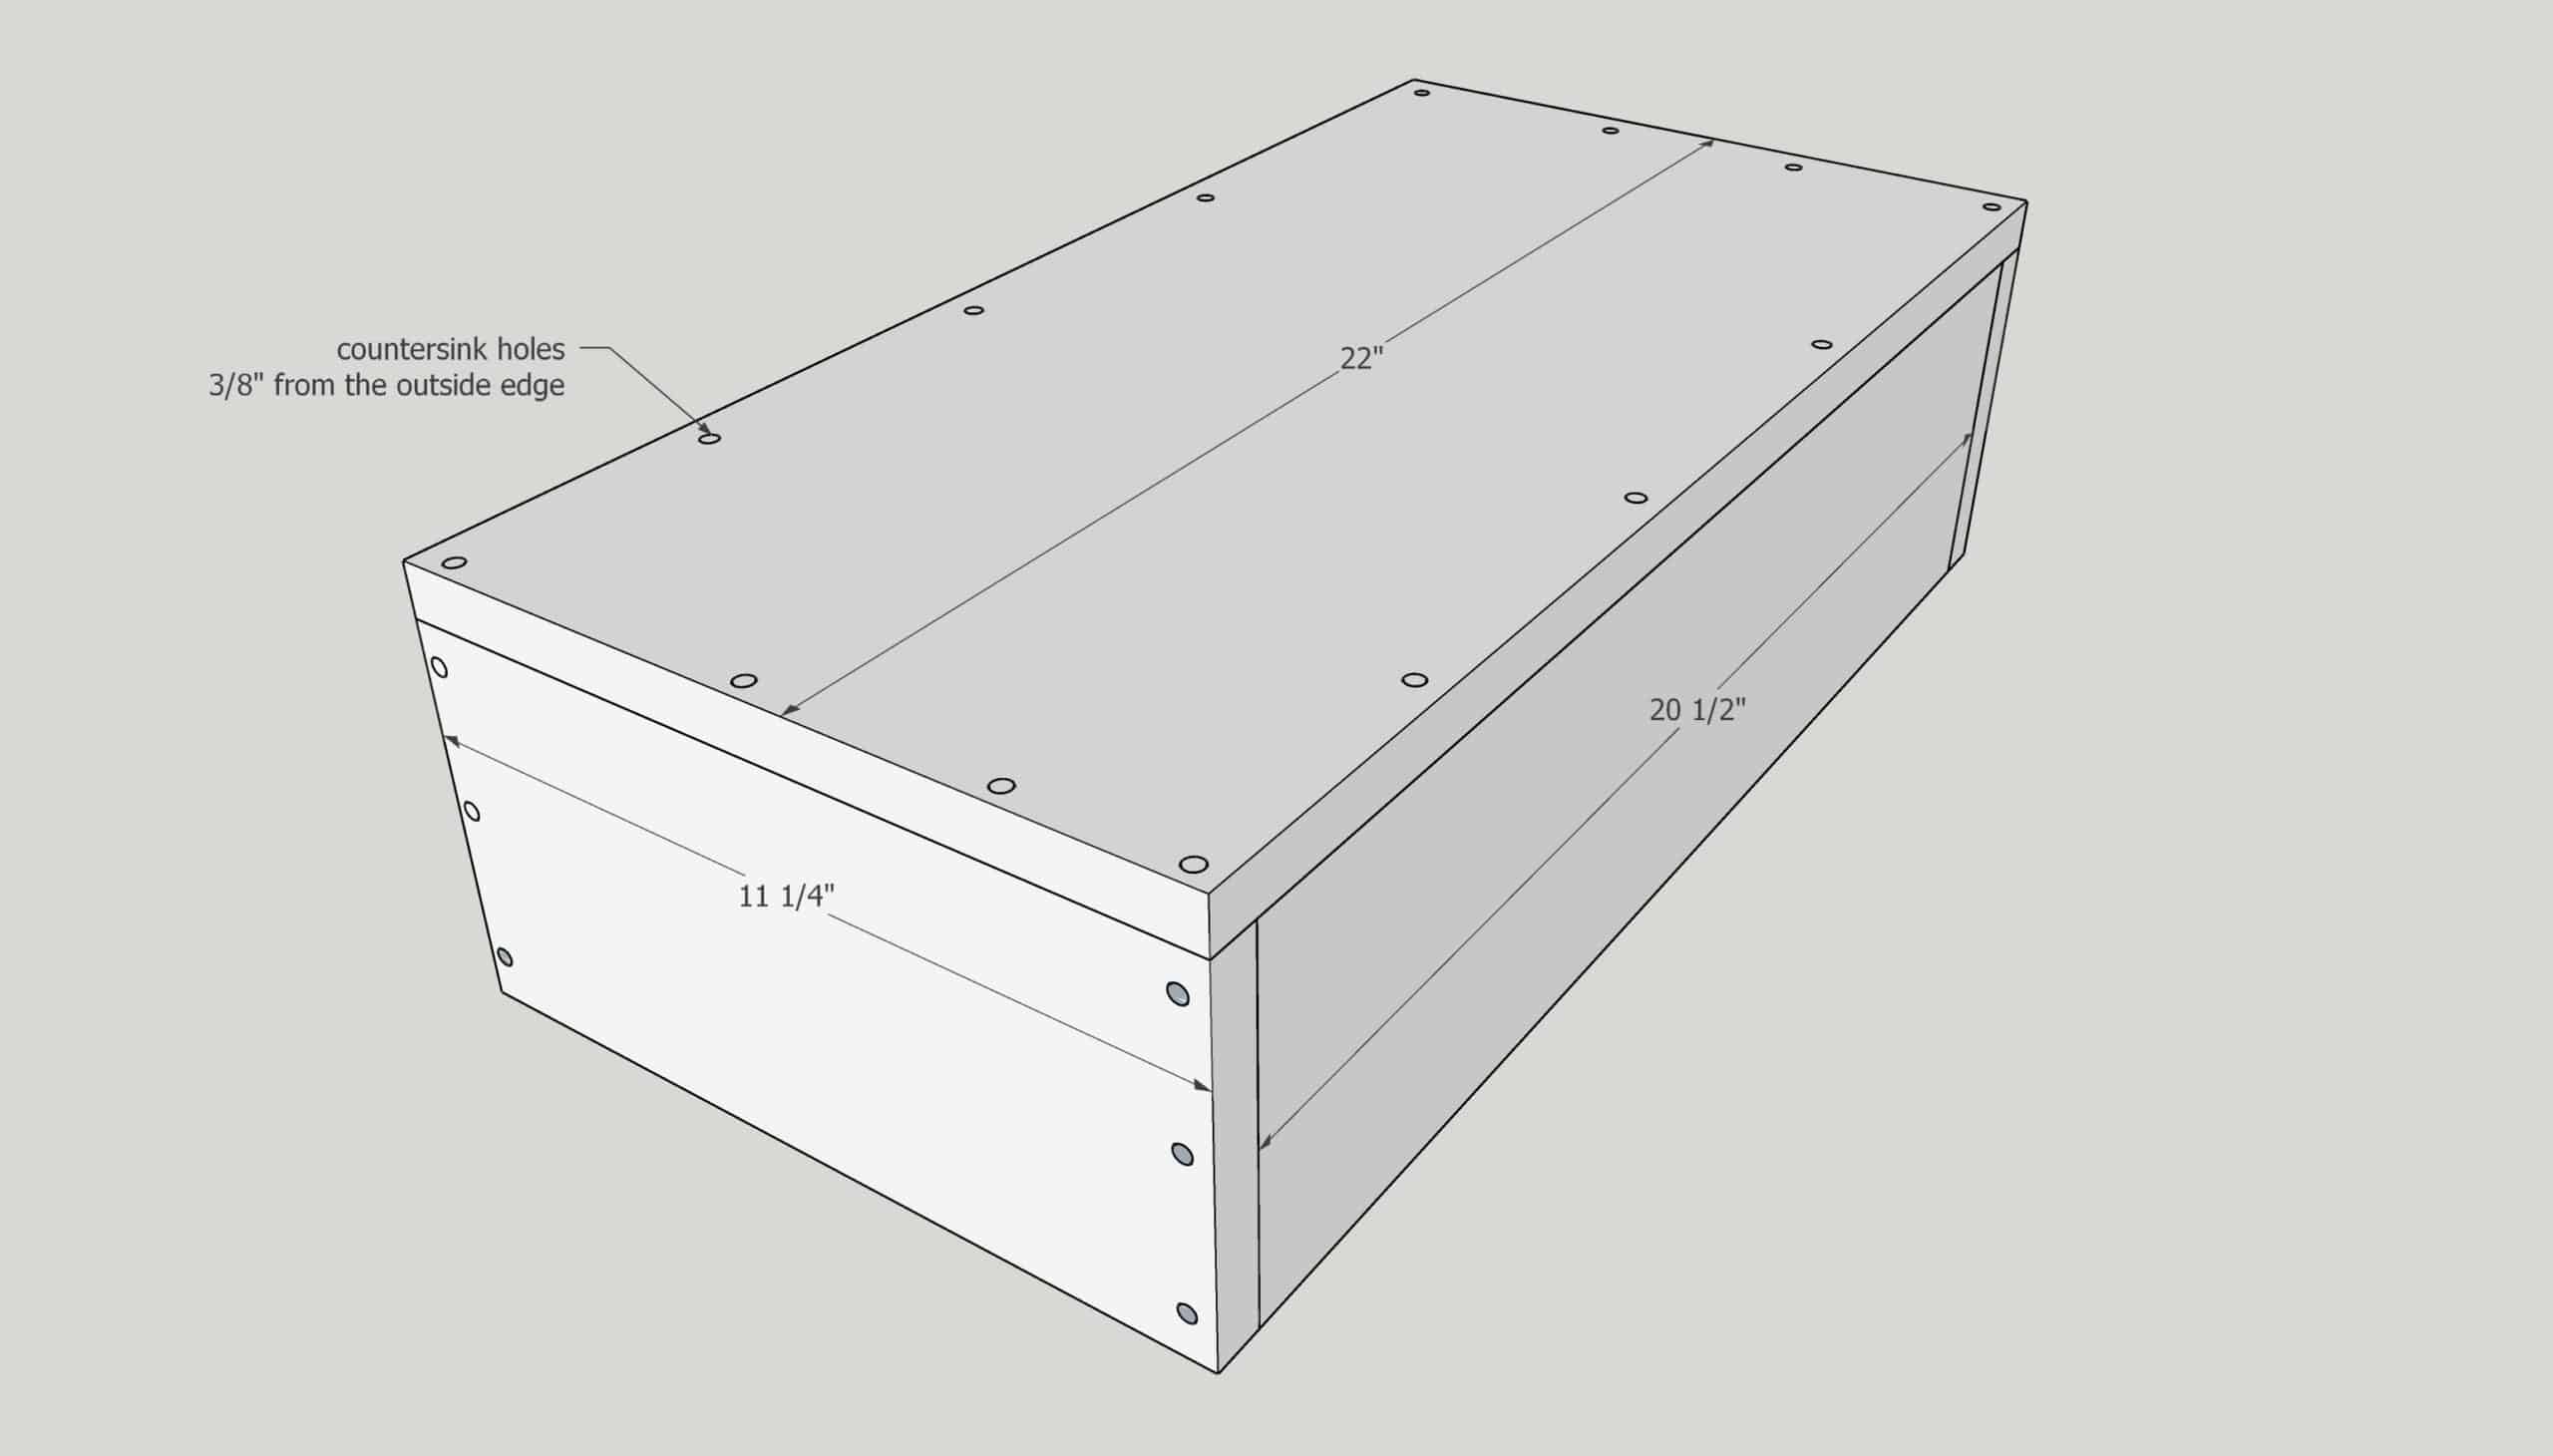
My opening is 11 ½" broad, and the eye mount drawer slides I used require one / viii" of clearance on either side. 1x12 boards are actually eleven ¼" wide, so information technology was the perfect size for the bottom piece! You lot could besides utilise ¾" plywood and cut it to the required size.
Once yous've figured out the dimensions of the bottom of the box, you need to decide how alpine to brand the sides. A 1x6 board is actually v ½" wide, which is tall enough to proceed the trash tin can from tipping out of the drawer without adding a lot of unnecessary weight.
Cut the Drawer Box Pieces
Cut your lumber to the required dimensions using a miter saw, round saw, or even a miter box. If you're making two pull out trash cans (one for trash and the other for recycling), you'll need to double the cuts.
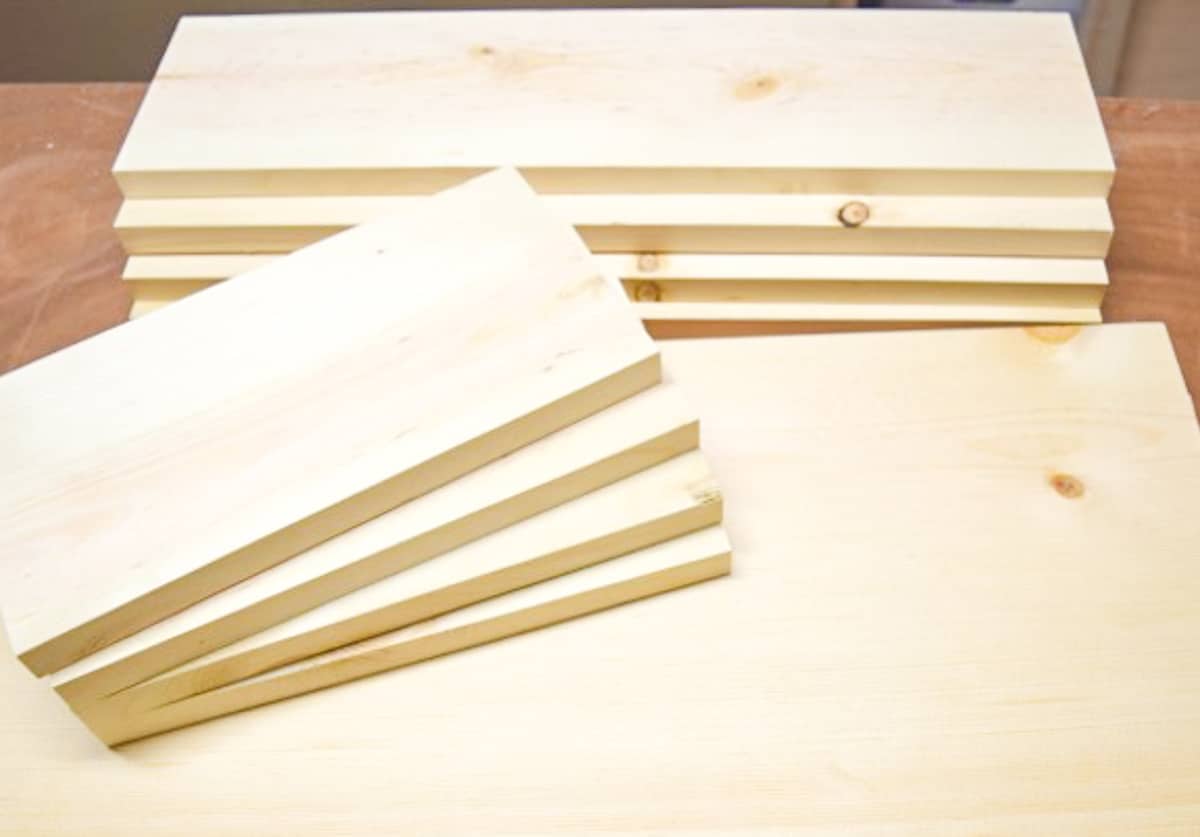
Hither are the dimensions I used for ane trash can drawer. Go on in mind that your measurements may be different depending on the size of your chiffonier opening!
| 1x12 | 1x6 | 1x2 |
| Bottom - Cut 1 @ 22" | Front & Back - Cut 2 @ xi ¼" | Drawer slide back up - Cut 1 at 11 ½" |
| Sides - Cut 2 @ twenty ½" |
Test Fit the Pieces
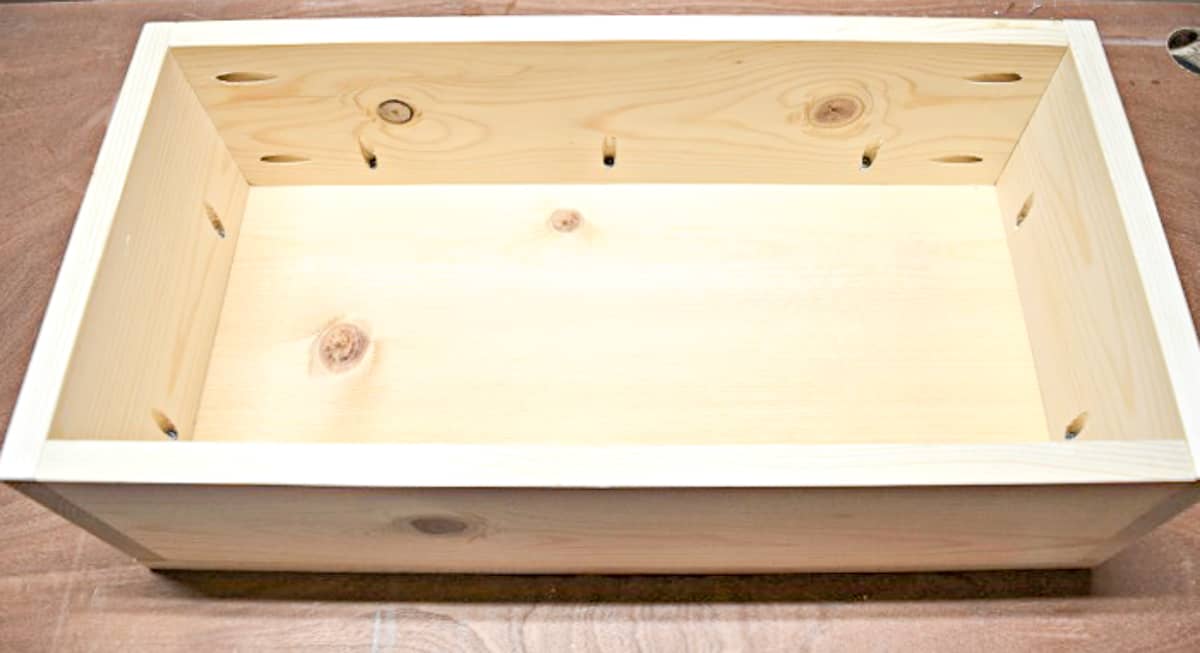
Test the fit all the pieces together earlier making any holes. The 1x12 board will serve equally the bottom of the drawer, and the 1x6 boards will sit on tiptop of it.
Predrill the Holes
You lot can assemble the trash chiffonier drawer box ii different ways: pocket holes or countersink screws.
Pocket Holes
Drill pocket holes at the ¾" thickness setting along i long edge of all the 1x6 boards, besides as the 2 short ends of the twenty ½" side pieces. You can gather the box with the pocket holes on the inside or the exterior. You tin learn more than almost how to use a Kreg Jig hither.
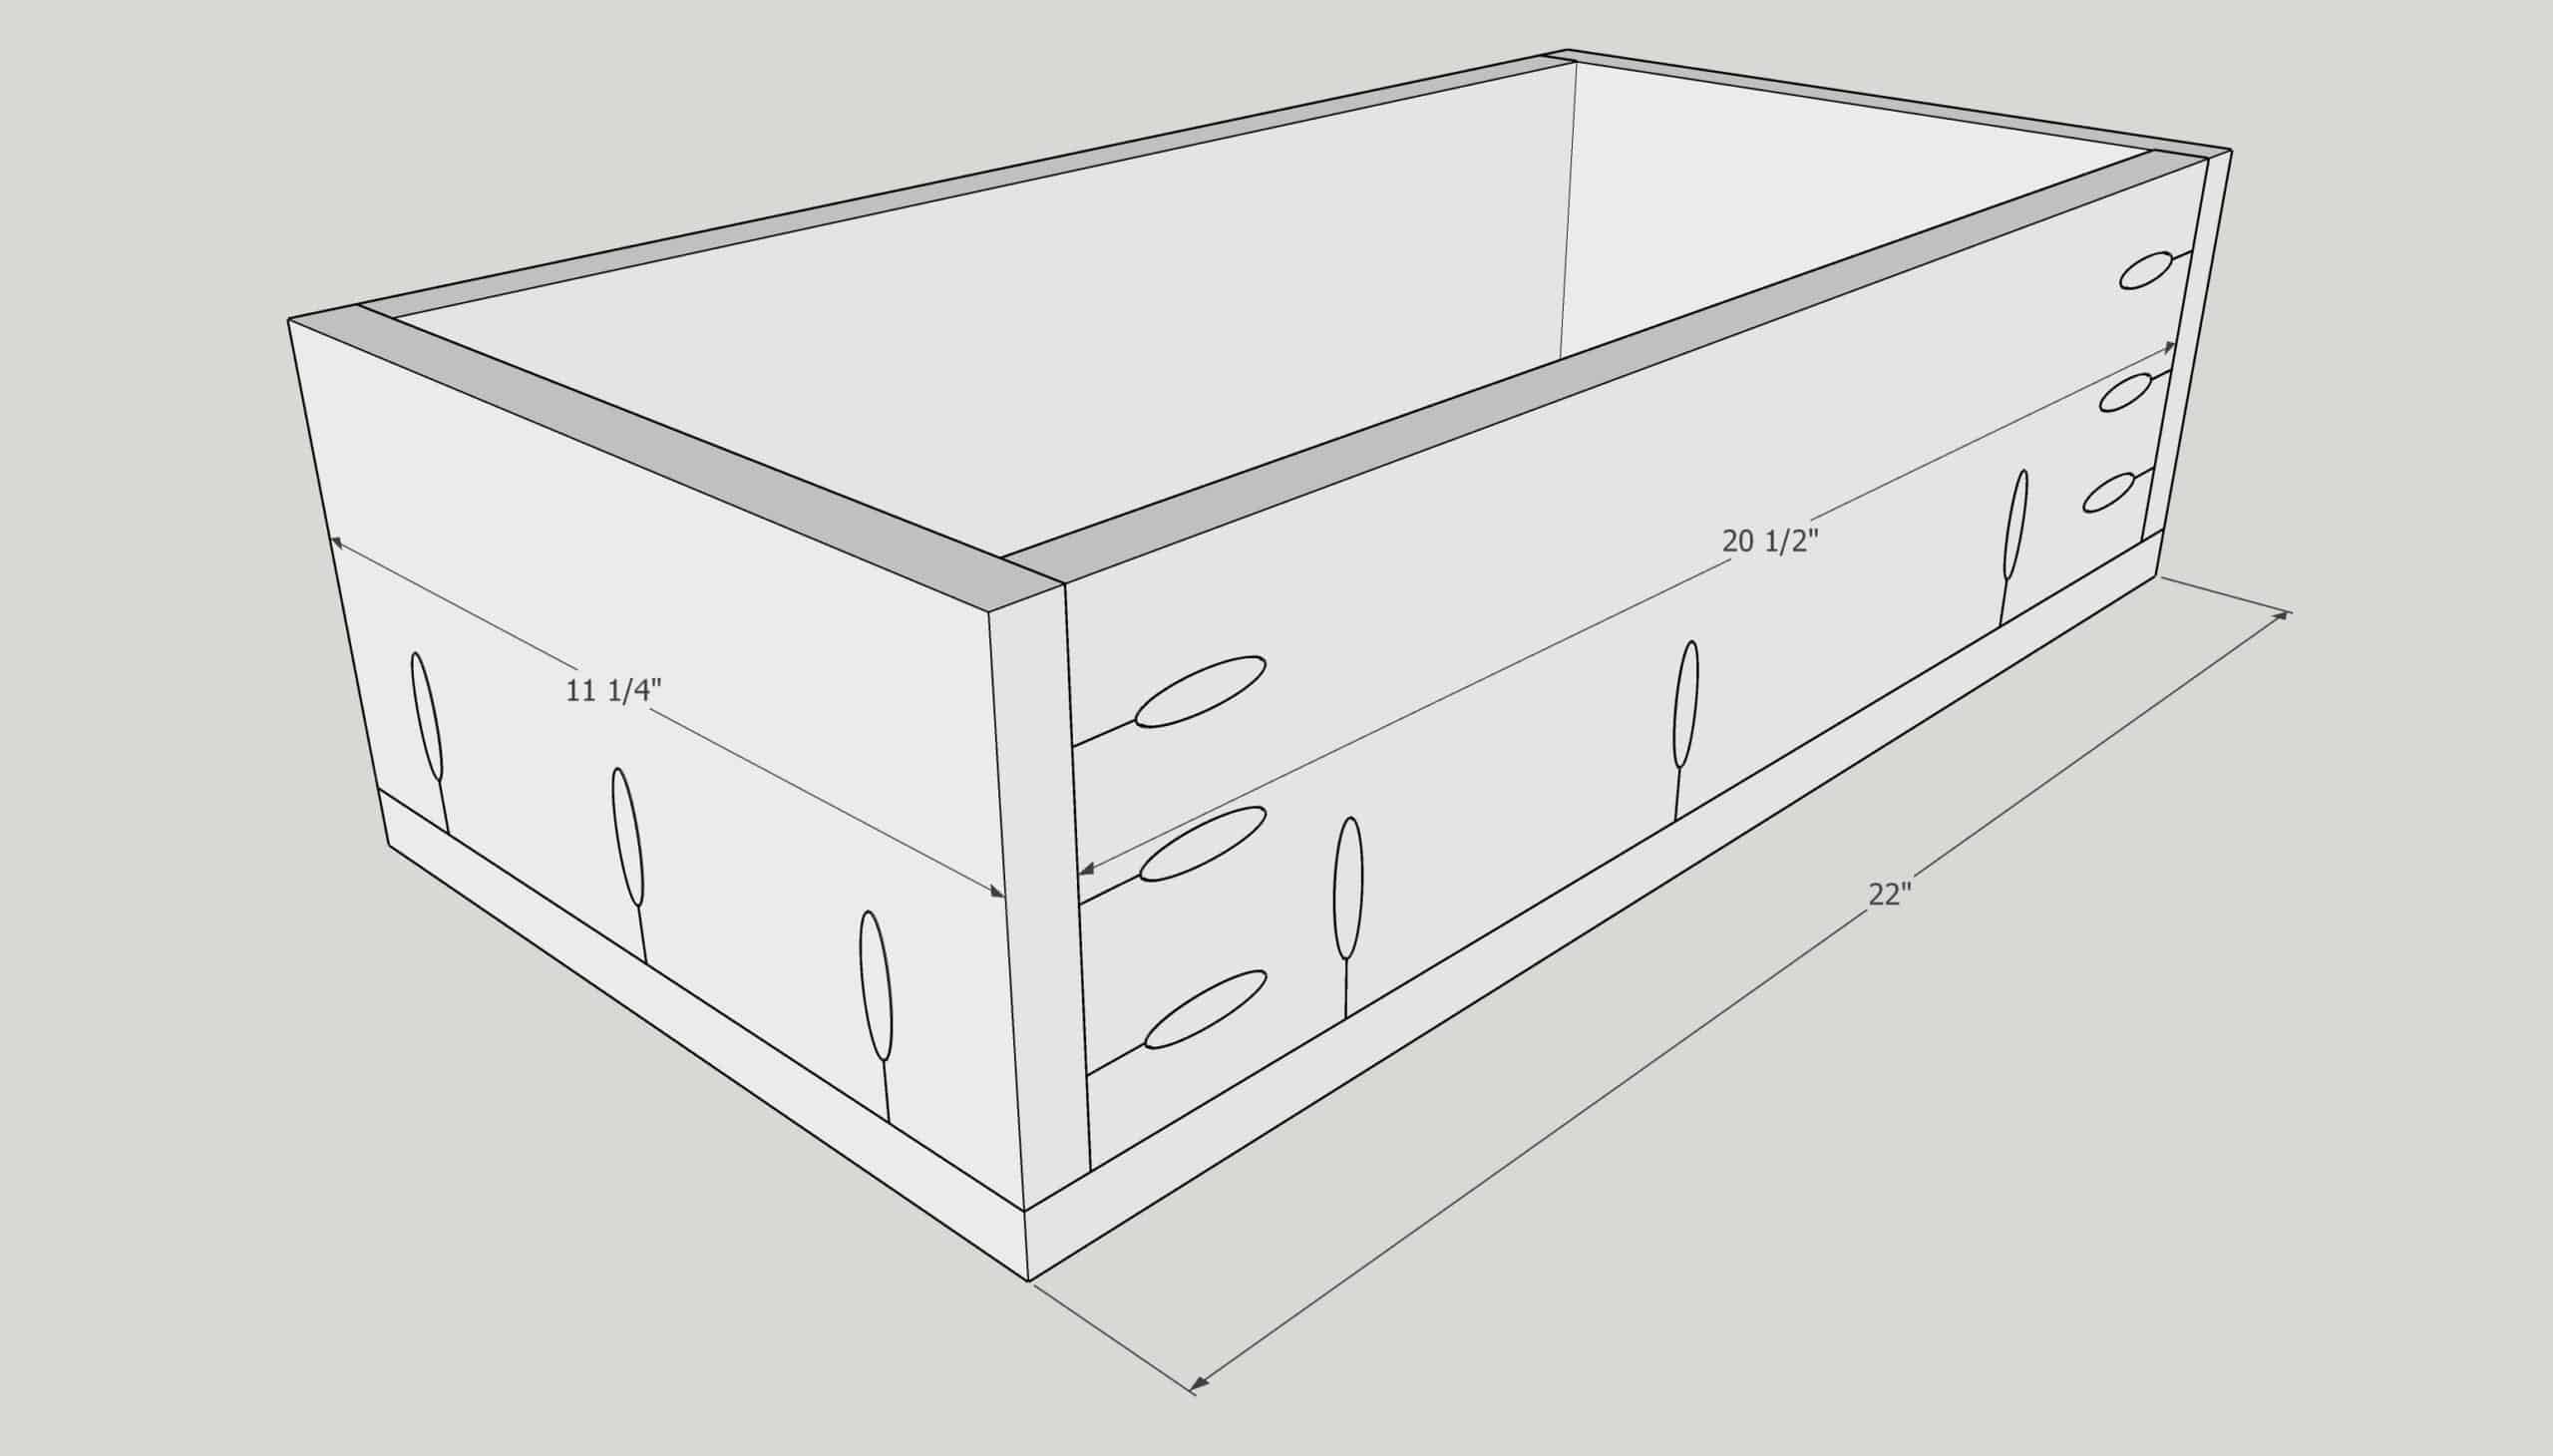
Countersink Screws
It's really important to sink the heads of the screws below the surface of the woods, so they don't interfere with the drawer slides. A countersink bit predrills the screw hole and creates a divot where the screw head will residuum, leaving the sides flat.
Drill the countersink holes forth the entire perimeter of the bottom piece, likewise as the sides of the front and back pieces. I recommend marking a line ⅜" in from the outside edges so yous drill the hole smack in the centre of the adjoining boards.
Get together the Trash Can Drawer Box
Apply wood mucilage to the adjoining 1x6 pieces, and utilize clamps to hold everything together. Then assemble the exterior of the box with 1 ¼" pocket hole screws or 1 ¼" flat head forest screws.
Then identify your rectangle on top of the 1x12 base, and screw information technology down. Make sure the sides line up with the outside border of the box, and that everything is square.
Yay, you have a box! Now we need to make the box move.
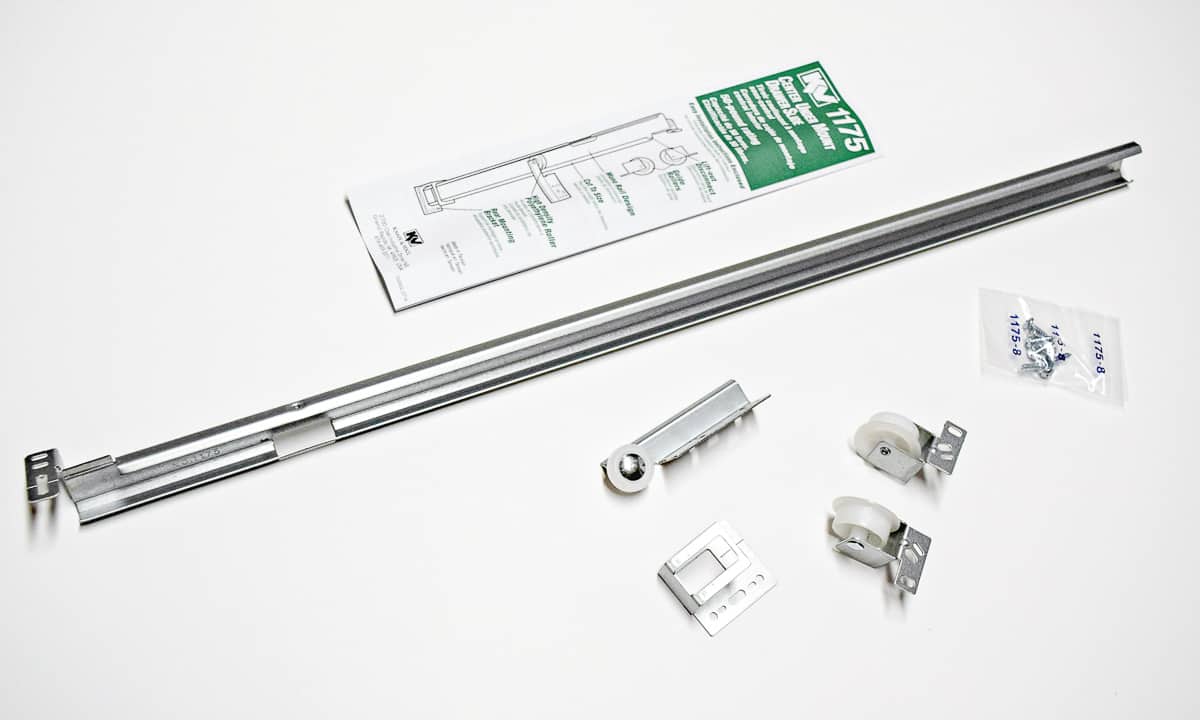
Install the Drawer Slide Hardware
I went back and forth about whether to install regular drawer slides that attach to the sides, or a middle mount system that goes on the bottom.
I settled on these centre mountain drawer slides because it makes removing the drawer from the rail super uncomplicated. I didn't want trash to get caught under or behind the drawer and not be able to get information technology out easily. With this arrangement, you only lift the drawer off the rails to clean out the chiffonier.
If you prefer to apply side-mount drawer slides, there'south a great tutorial on how to brand a trash can cabinet with this method in the video beneath!
Start by installing the bracket in the dorsum of the cabinet. It should be centered in the middle of the cabinet opening and raised upward slightly according to the instructions. The long runway rests inside the back bracket.
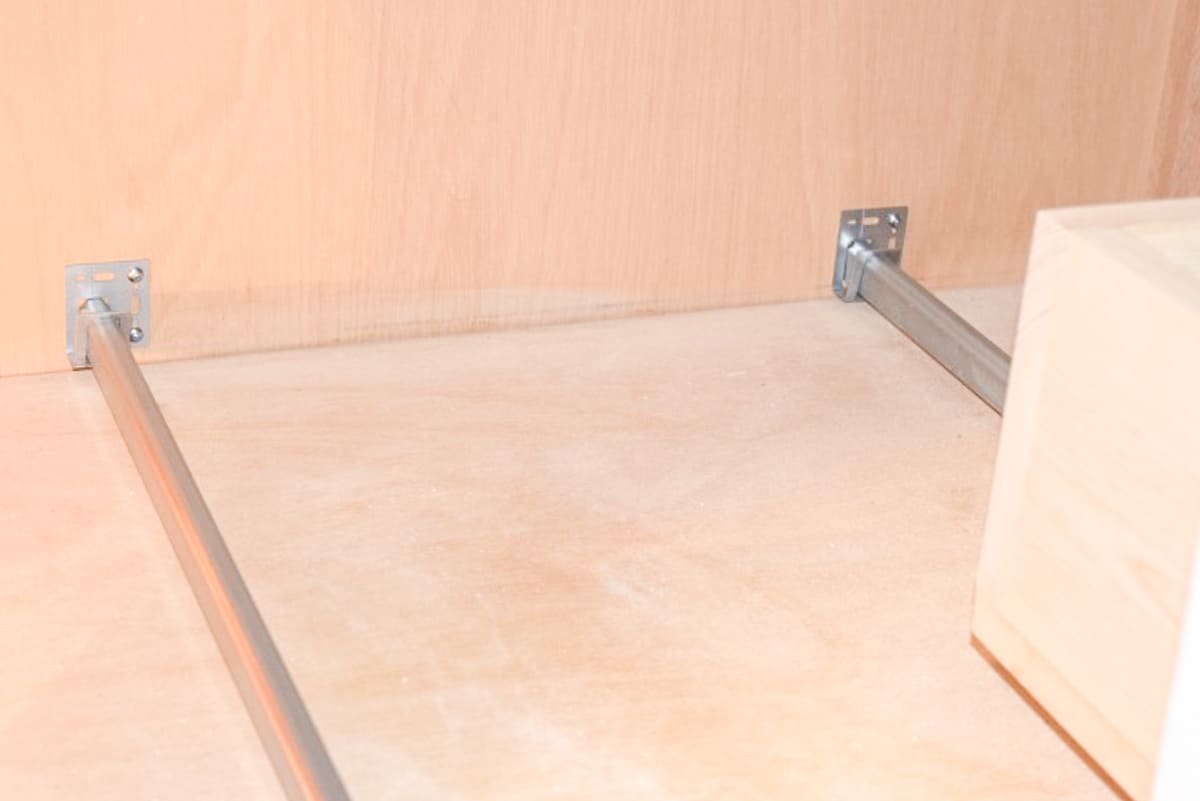
Now you demand to attach the front of the rail to the front of cabinet. Cutting a piece of 1x2 to the exact width of the opening and attach information technology to the front end of the chiffonier. Then spiral the other stop of the rail to the middle of the board, and the side guide wheels on the ends.
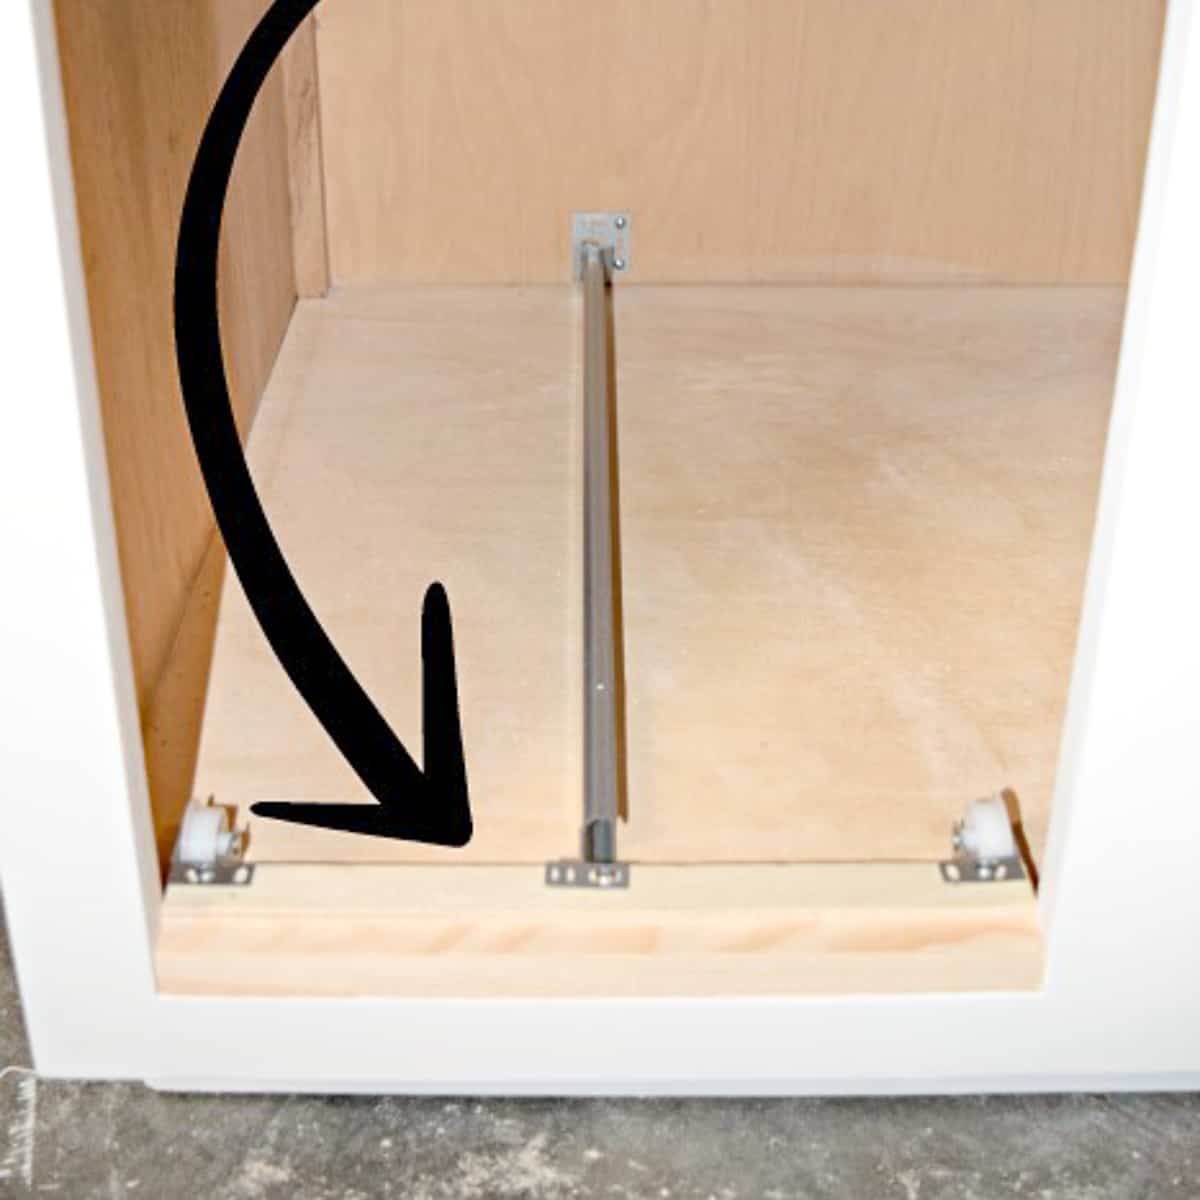
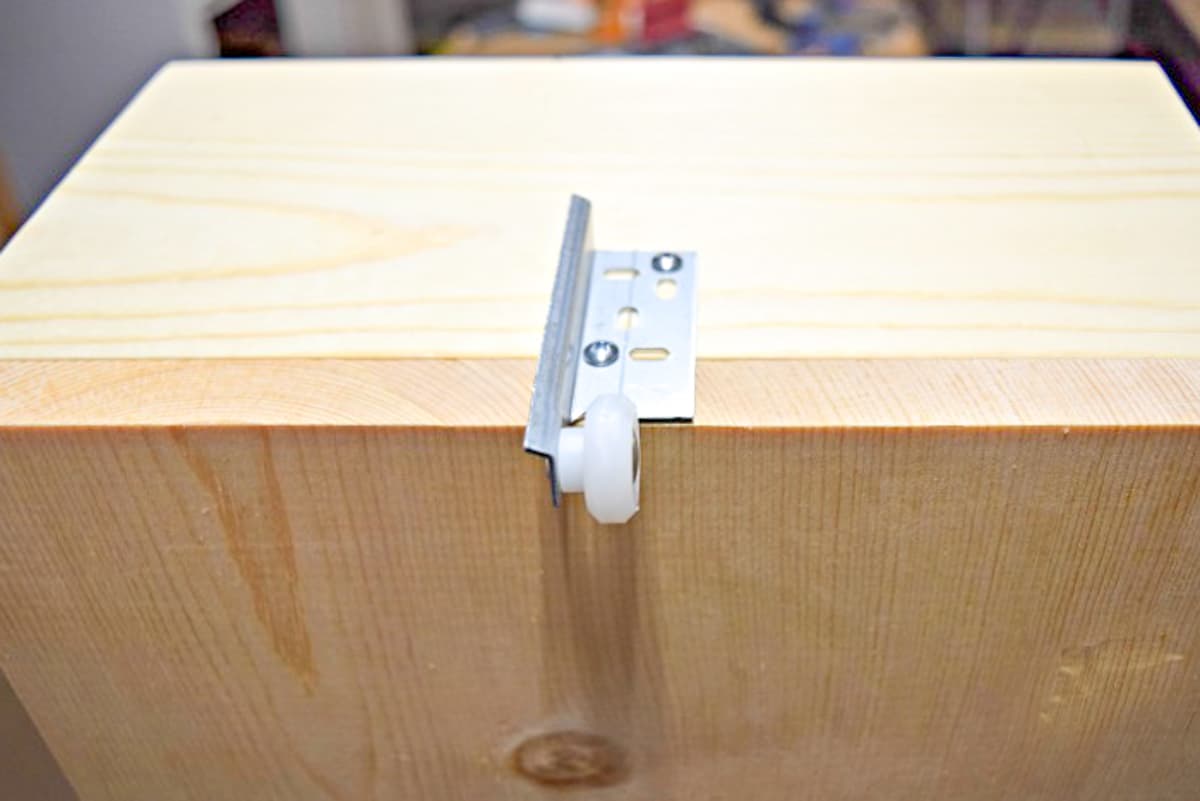
Finally, attach the small bicycle to the centre of the back of the trash can cabinet drawer. This will sit within the rails and allow it to coil smoothly.
Examination Fit the Drawer
Pop the drawer into the rail and see how information technology works! I needed to adapt the side wheels slightly so that the edges of the drawer slid smoothly against the guides. The front of the drawer should be flush with the outside edge of the trash tin can cabinet opening.
Install the Door Handle at the Summit
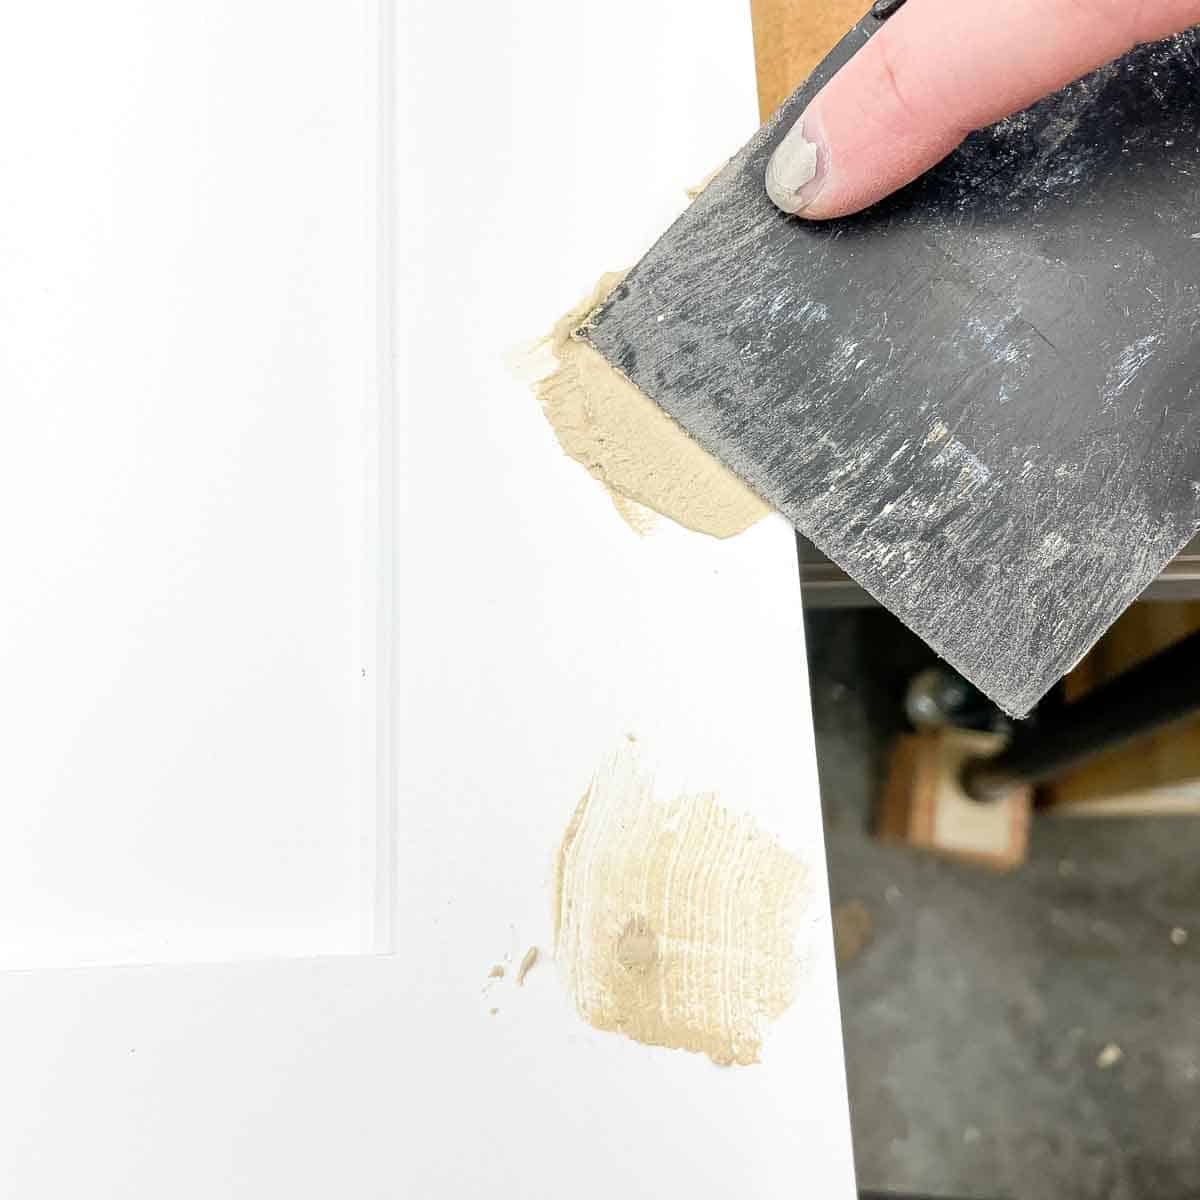
While you don't have to alter the location of the door handle, it will help forestall wear on the drawer slides if it's centered at the pinnacle. Otherwise, your drawer will outset pulling to the side and the door will be crooked.
Since I was repainting the whole trash cabinet anyway, I filled in the spiral holes on the cabinet door and drilled new ones at the top. Once information technology's painted, the wood filler disappears!
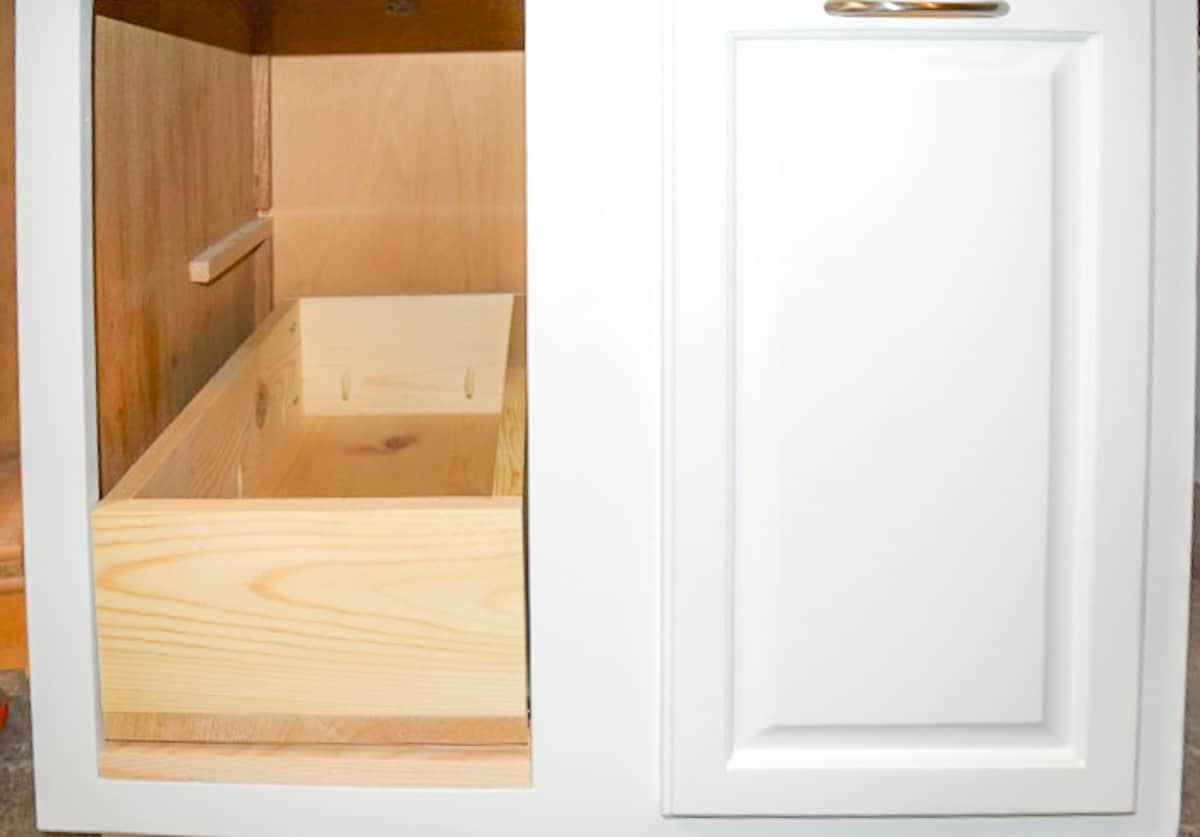
Adhere the Cabinet Door to the Drawer
You'll want the cabinet doors on both sides to line up at the acme and bottom. The easiest way to do this is with double sided tape! I prefer to use heavy duty carpeting tape, because it'due south extra glutinous and works well for this trick.
Stick it to the front of the trash can drawer, and remove the protective bankroll. Then align chiffonier door with the 1 next to it, and press firmly. The door should stick to the drawer box, so you can gently pull information technology out and attach it with screws.
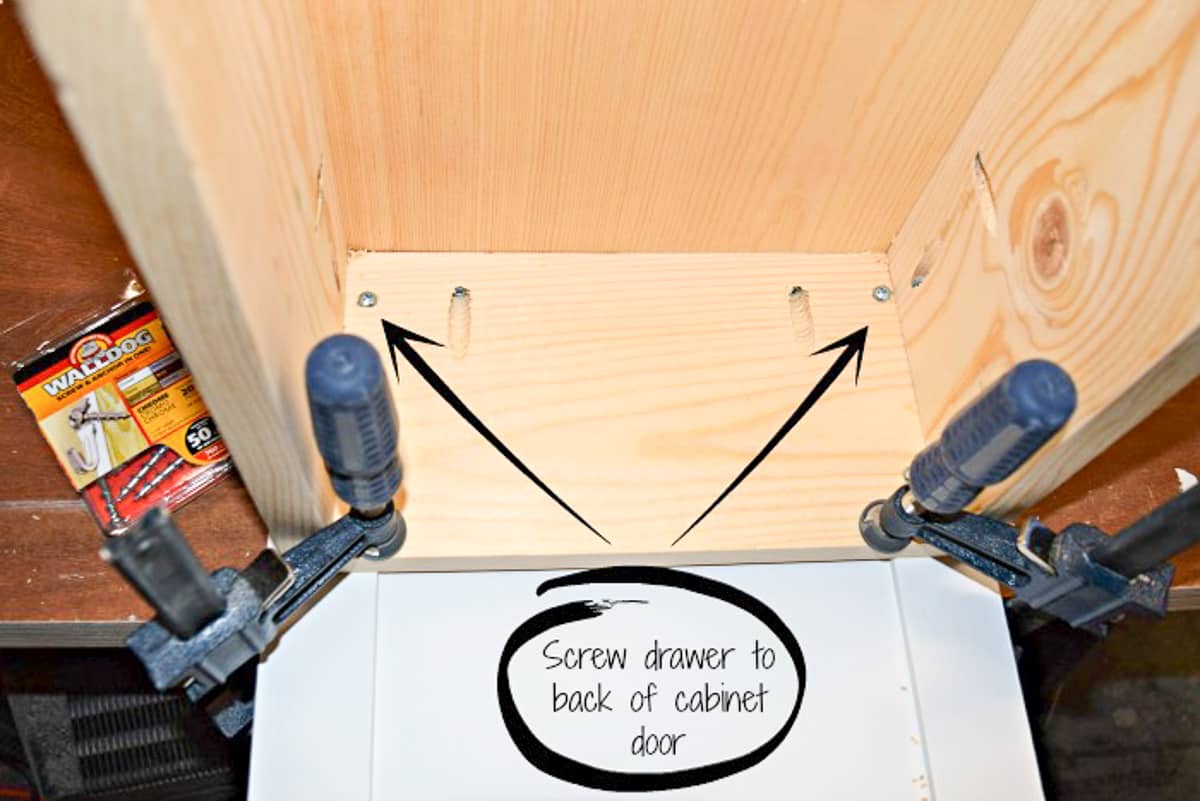
It's of import to bank check the length of the screws you lot volition be using to attach the cabinet door. The last thing y'all want is to accept a spiral poking out the forepart!
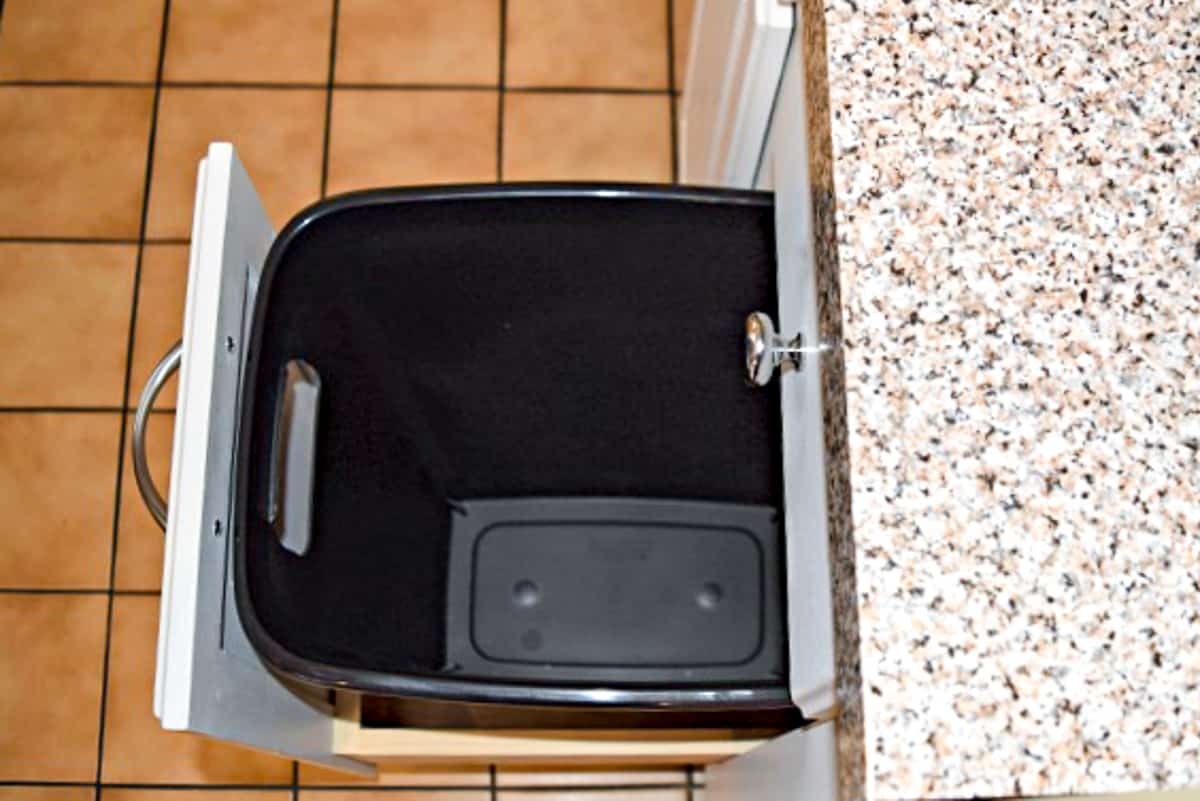
Insert the Trash Tin Cabinet Drawer into the Rail
Now merely insert the drawer wheel into the slot on the rail and slide it into identify. I cut some grippy drawer liner to fit inside to prevent the trash can from moving around when the drawer gets slammed.
I saved so much coin by making my ain pull out trash tin chiffonier rather than shelling out for an expensive pre-fabricated kit! I'll exist edifice the same trash and recycling pull outs when nosotros remodel the kitchen too.
Check out these other kitchen project ideas!

Source: https://www.thehandymansdaughter.com/diy-pull-out-trash-cabinet-tutorial/